The COVID-19 crisis in the United States and around the world completely upended the way people perform day-to-day activities. Interactions at many restaurants quickly became digital-first as delivery, curbside pick-up, or drive-thru-only became common with dining rooms across the country shuttered. The response from most chain restaurants was also swift – ads ran to let consumers know about contactless delivery and their online ordering.
Without the budget for fancy digital agencies or an in-house website development team, many small businesses were left scrambling to figure out how they were going to continue to sell their products in this strange new world we found ourselves in.
Many states are beginning to reopen, but the demand for online ordering for restaurants hasn’t gone anywhere. If you own a restaurant or foodservice business, the good news is that it’s now easier than ever to start accepting online orders from customers! E-commerce platforms such as Shopify and Ecwid have responded to the COVID-19 crisis by offering features that help small businesses create online ordering websites quickly.
Here is how you can start taking online orders using Shopify today.
Setting Up Shop
First, you’re going to want to set up a Shopify account if you don’t have one already. Shopify’s Basic package (which includes all of the features I will be discussing below) costs $29 a month, but the first 14 days are free. The 14-day trial gives you ample time to set up your restaurant’s website to your liking – although we were able to get our test site up and running within a couple of hours.
Once you have created your Shopify account and verified your email address, you can now start putting together your website by first choosing a theme to work with. You can browse through the various pre-designed templates and choose one that suits your needs. In the themes section of the Shopify website, you can filter by various website design features. Some of these templates need to be purchased for an additional fee, however, there are many free templates available that will do just fine.
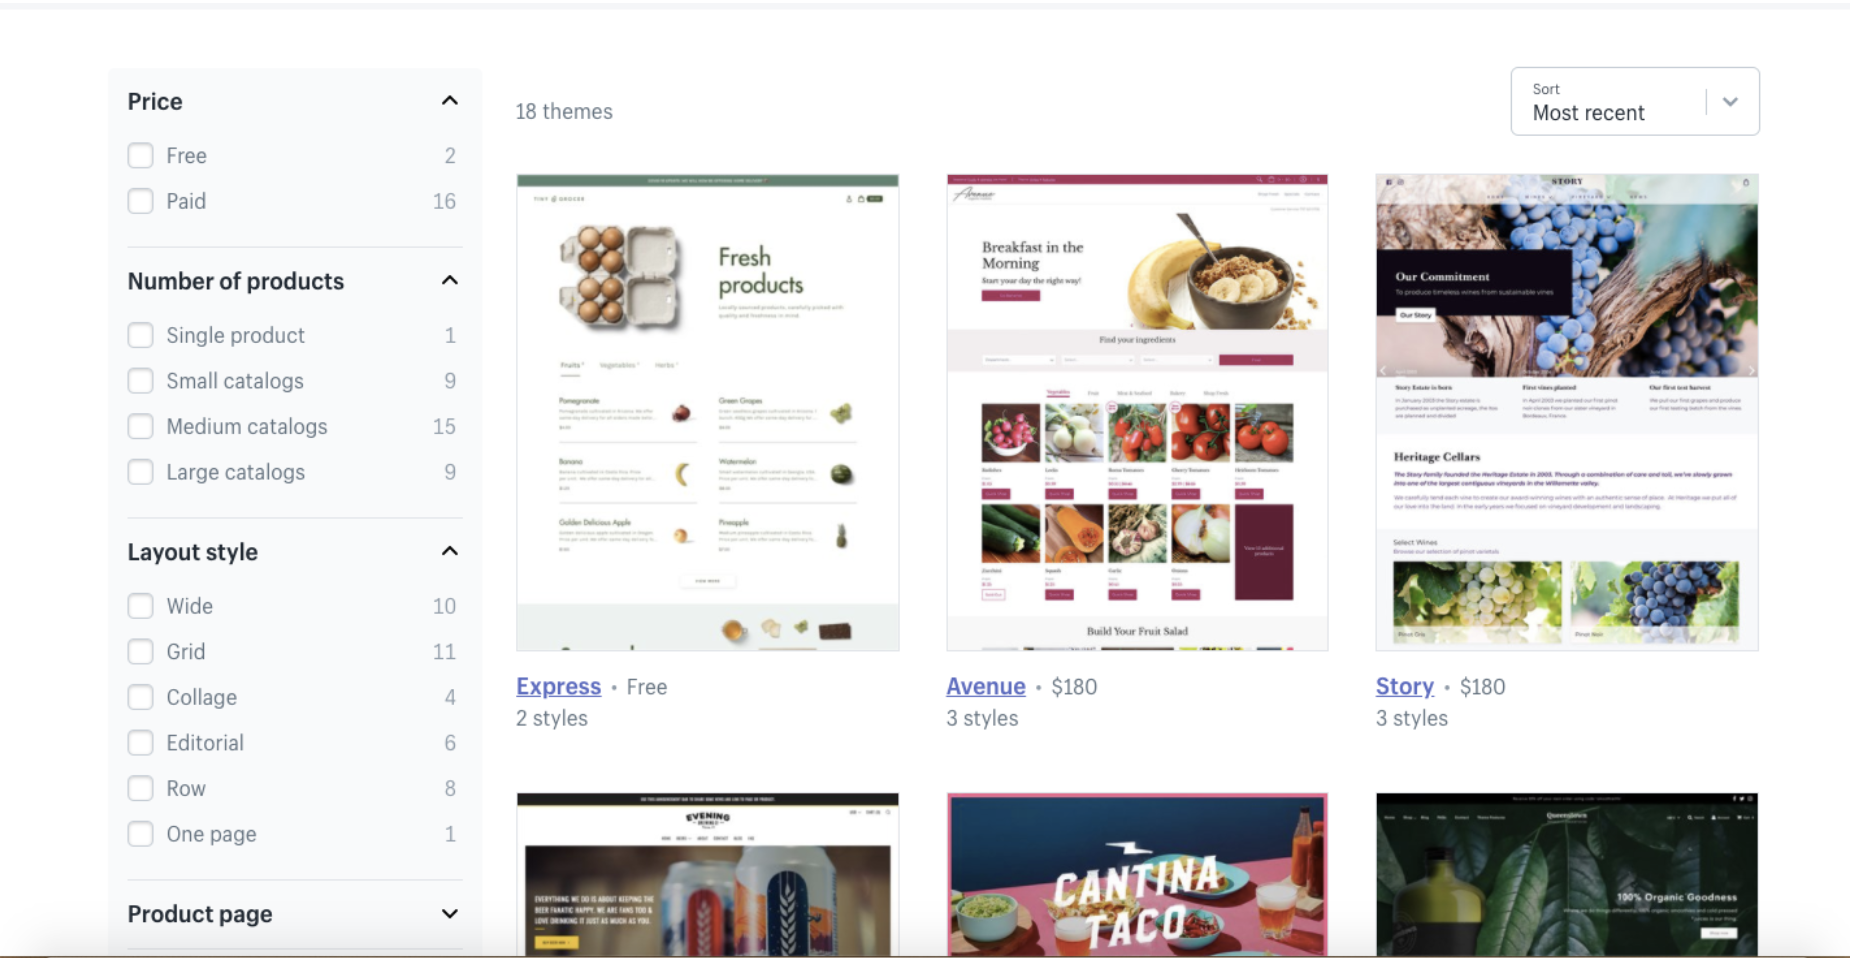
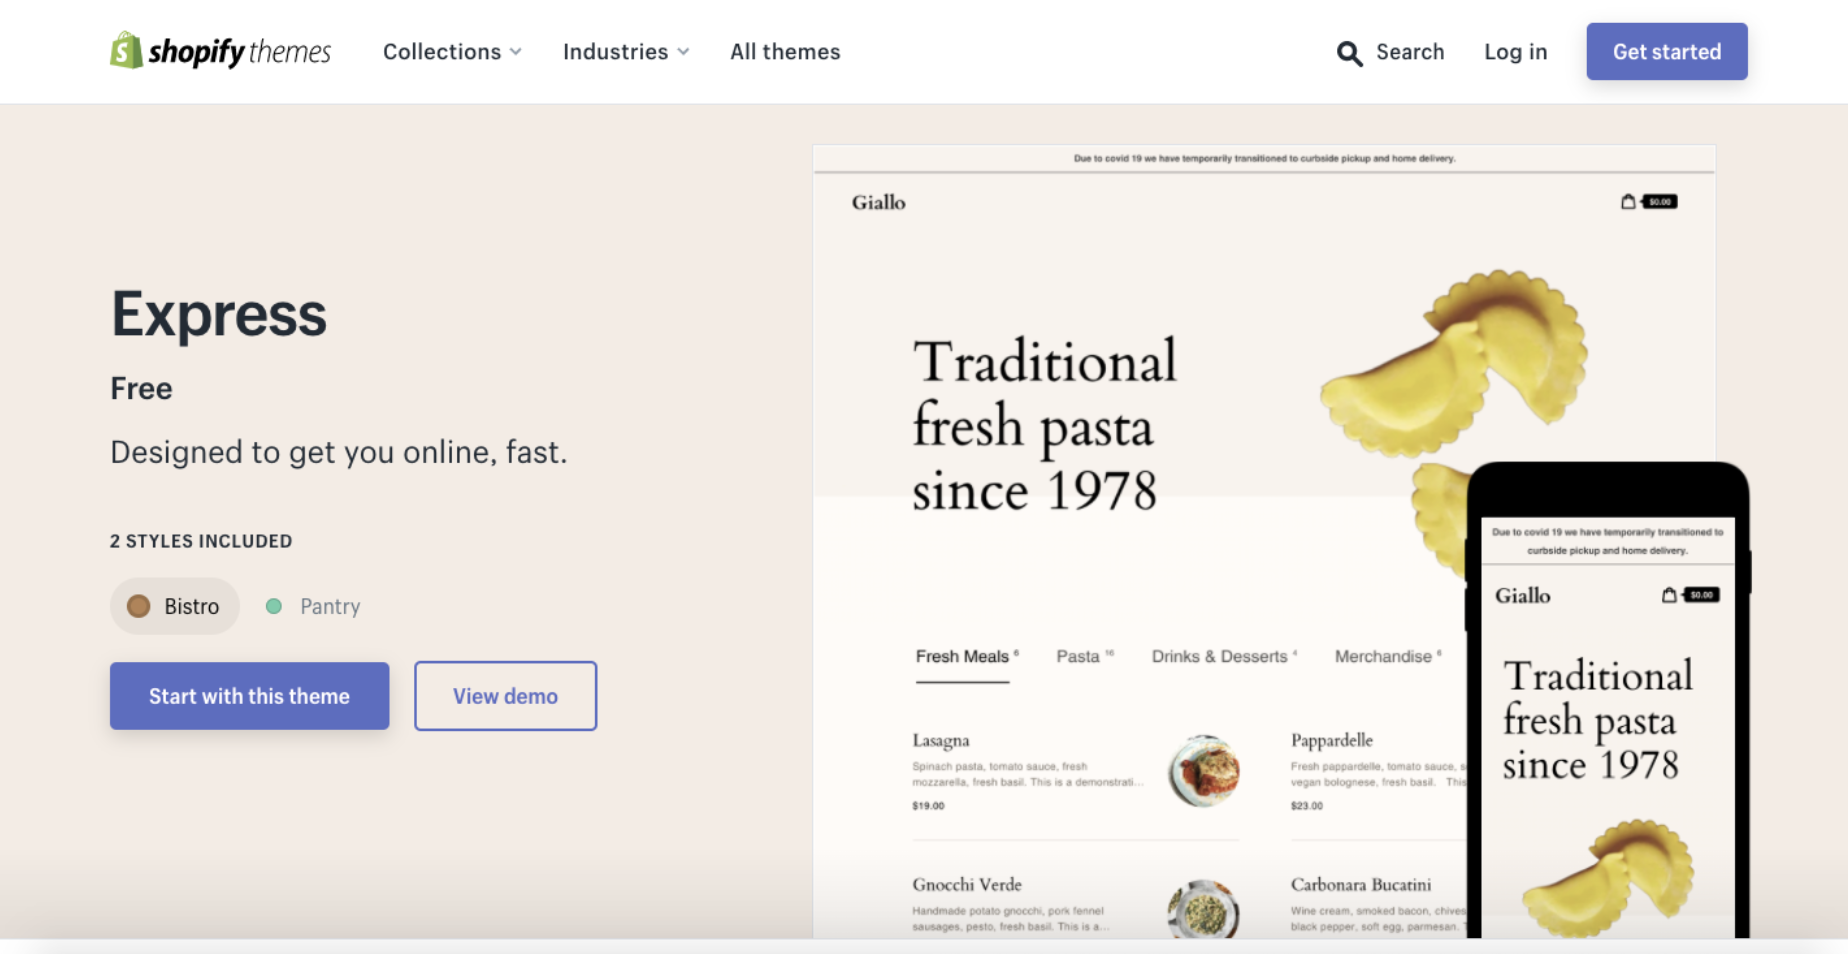
For our website, we chose a theme called “Express”. This theme is free and was specifically designed by Shopify for the restaurant industry. The simple design is ideal for restaurants with smaller menus that want to establish their online ordering as quickly as possible, without sacrificing any of the design quality.
Adding Products to Your Online Store
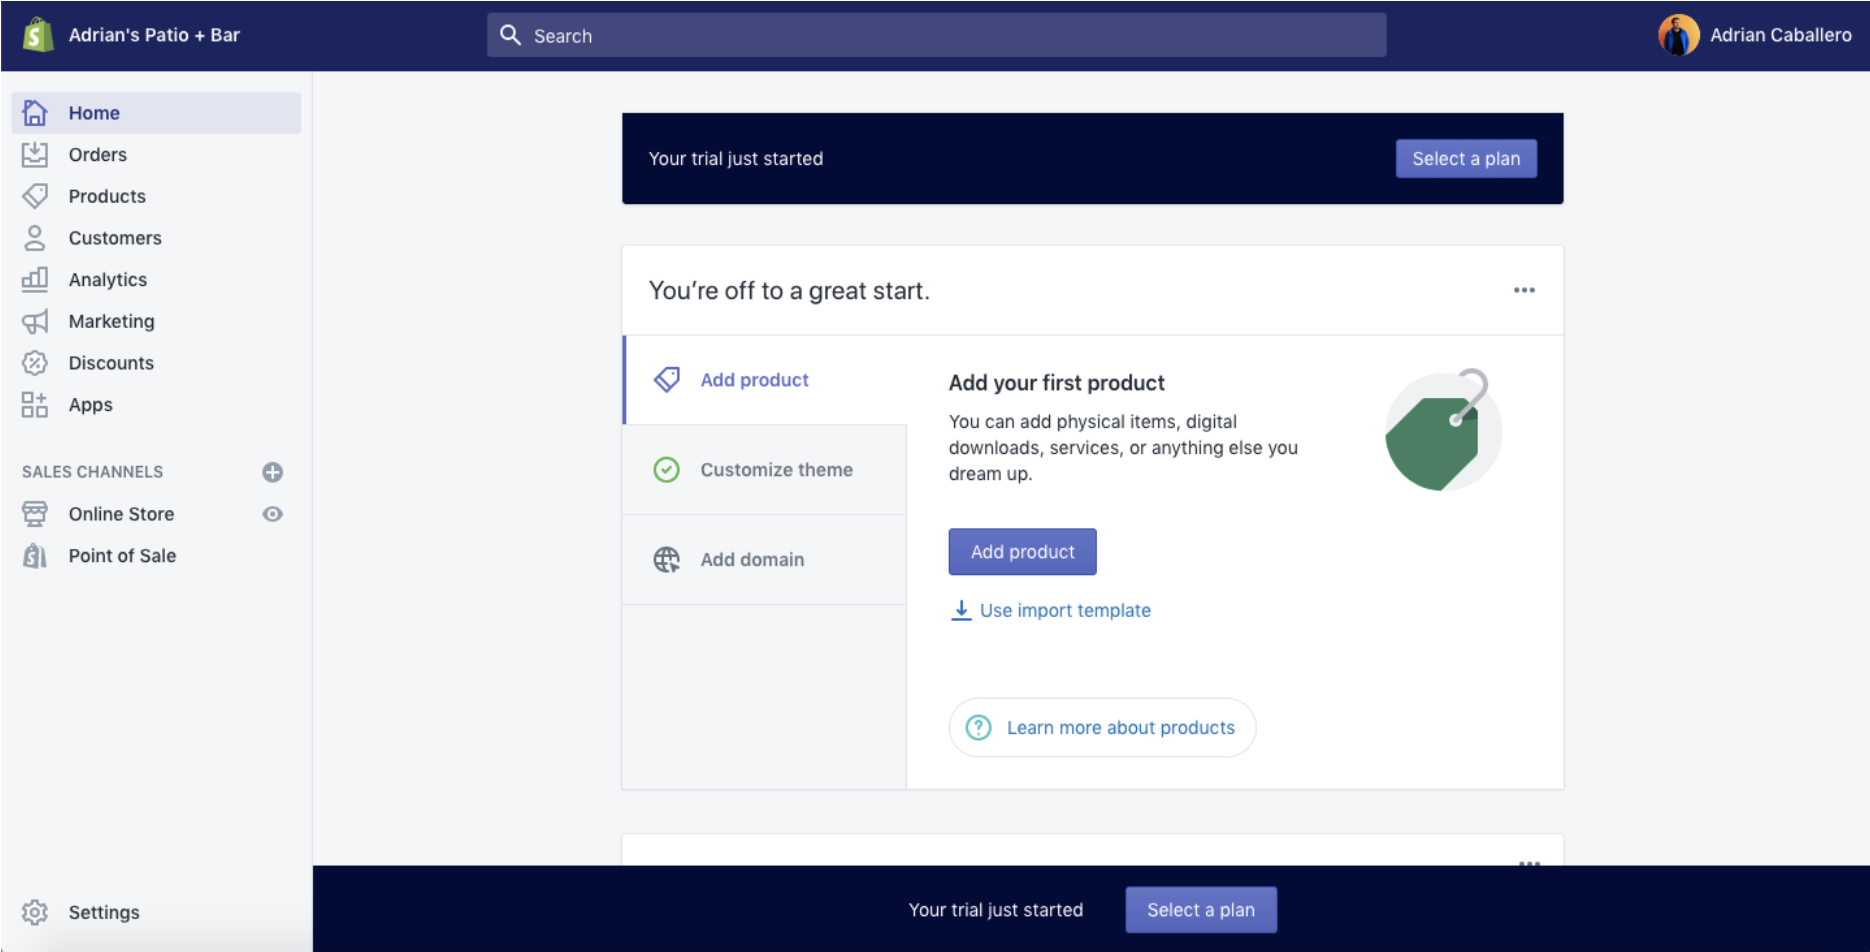
After you’ve chosen a template and named your store, you’ll be directed to your website’s dashboard. This is the digital hub of your online presence. You will use the dashboard to manage the products offered on the website, add pictures and descriptions, view orders, and connect a domain if you have already purchased one for your restaurant’s online ordering website.
At this point in setting up your restaurant’s online ordering, you’re going to want to add the products you will be offering, simply by clicking on “Add Product”.
You can then add product descriptions and pictures of the menu items. The more detail you add here, the more you are helping your customers make informed choices when ordering from your online menu.
Because a customer can’t simply return food to the kitchen or easily add items to their order after they’ve placed it, the sensitivity your customers will have toward a poor experience will be greater than when they dine in. Clear descriptions of exactly what your customers will get when they order will help to ensure that your customers will be satisfied when they receive their food.
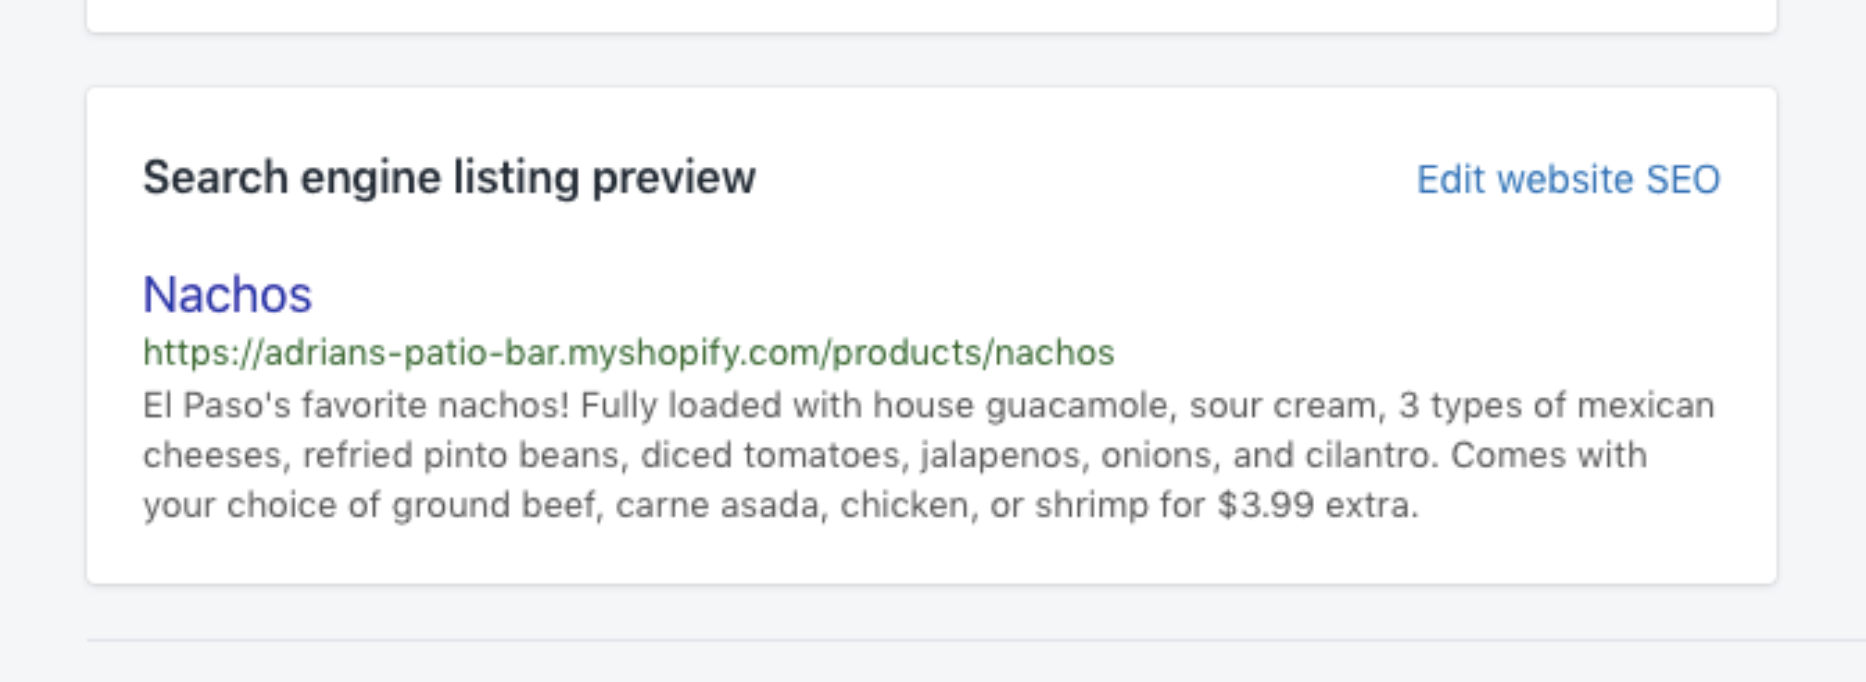
A well-written description will not only help customers on your website find what they’re looking for but will also help people searching Google. The bottom of the product page has a preview of how the menu item will appear in a Google search. Take this opportunity to optimize your website for local search.
Adding Your Products to Collections
Collections are groups of products from your Shopify dashboard – so for a restaurant, these groups will be things like appetizers and desserts.
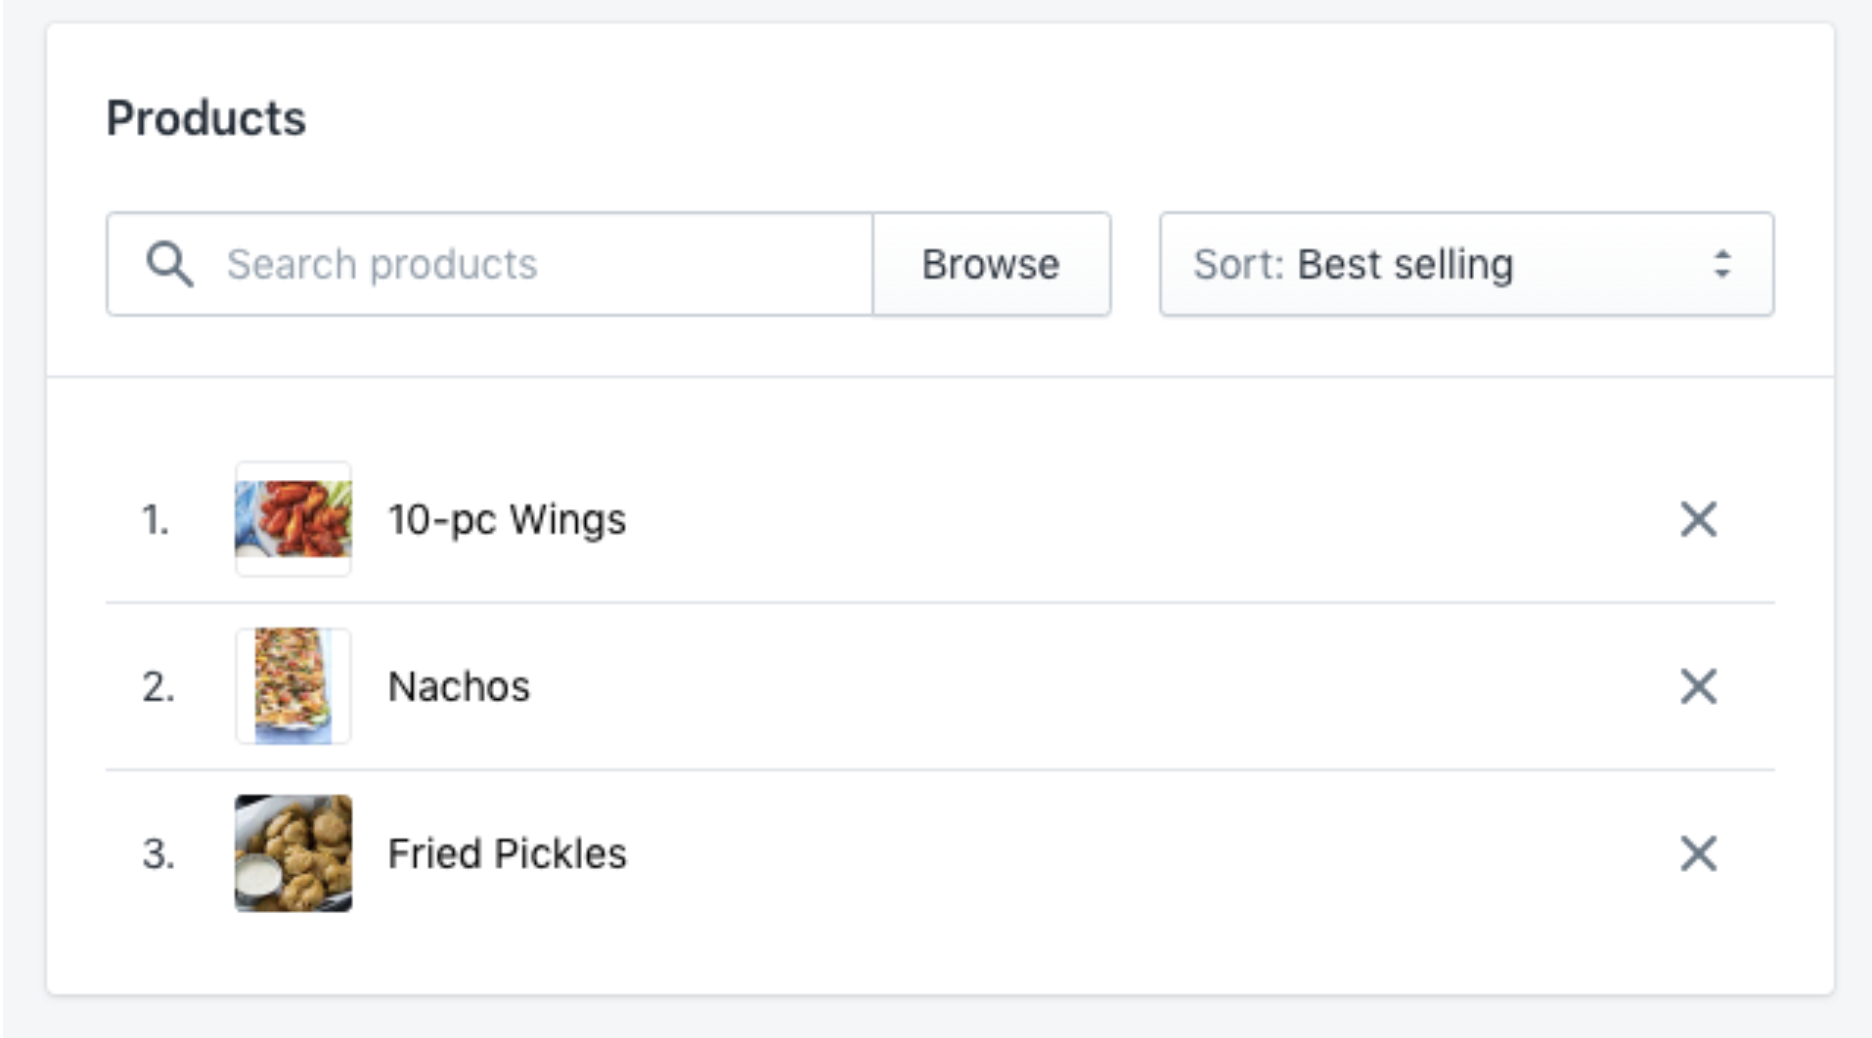
To begin creating collections for your menu, simply navigate to “Collections”, give it a name, and then scroll down to the “Products” section. You can use the search bar to search for products to add to each collection.
These are products we were adding to the “Appetizers” collection.
Setting Up Local Pick-up and Delivery
Even though states have gradually begun opening, the demand for curbside pickup and delivery options has yet to cease. It’s important that your restaurant has the ability to take these orders and fulfill them. Shopify has recently made it really easy for your restaurant to start accepting local pickup and delivery orders online.
To enable local delivery and pickup on your restaurant’s new Shopify website, you will need to first navigate to “Settings” and then click “Shipping and Delivery”.
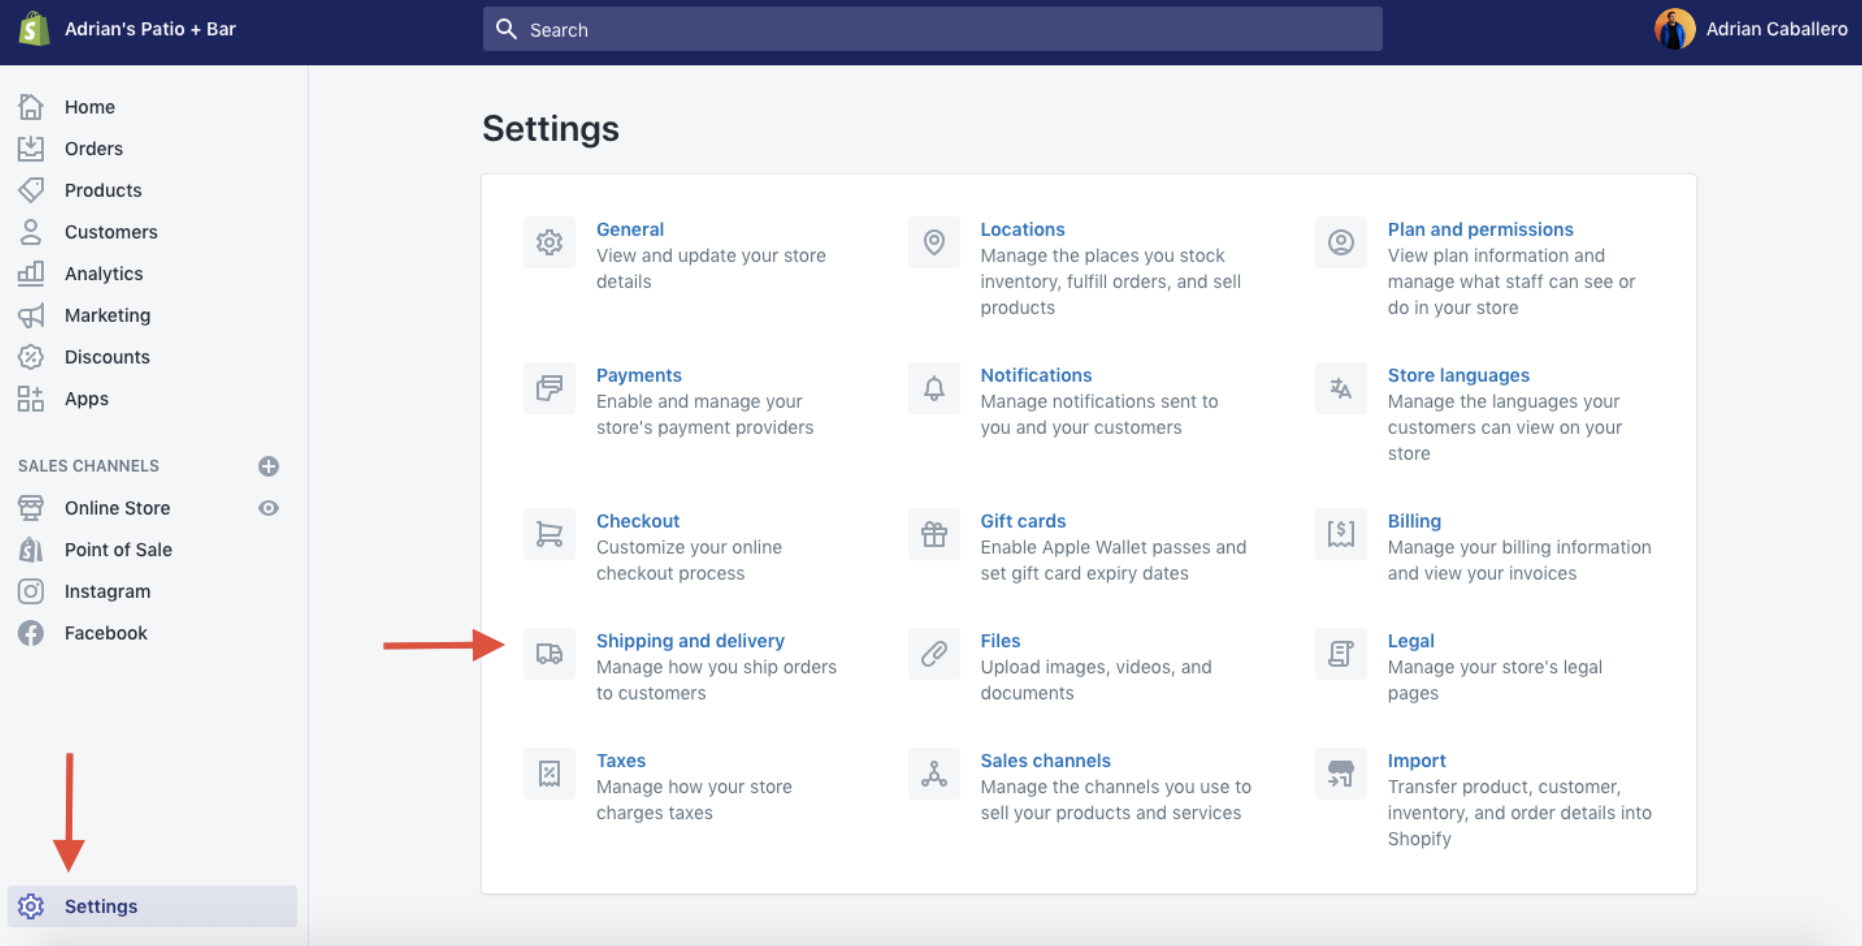
Many of the stores on Shopify’s platform are e-commerce stores that deal with physical products that require shipping, so some of these settings will not be relevant to your store. It’s possible that some customers may begin to order from your restaurant online, but will decide it’s too cumbersome or confusing if there is something that looks “off” (Like a customer being prompted to enter shipping information when you’re obviously not going to be shipping food to them). A bad checkout flow will result in lost sales, so make sure to disable anything that you won’t need, or that doesn’t make sense for your business, such as displaying shipping rates at checkout.
You can now enable and manage both local delivery and local pickup by navigating to those sections in the Shipping and Delivery settings.
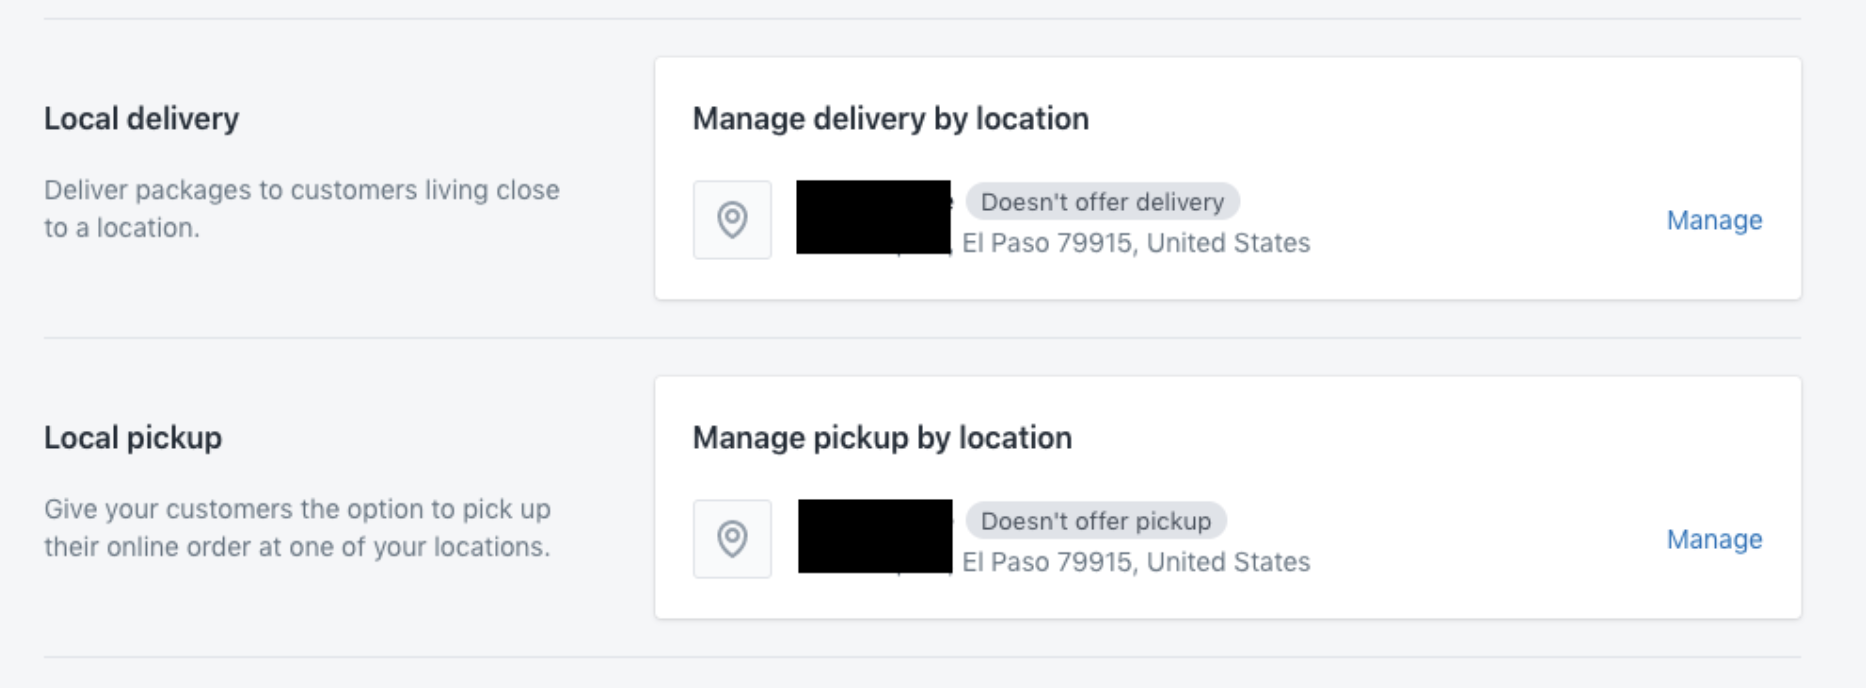
In each section, click “Manage” to begin enabling each feature. After you’ve navigated to the Manage Delivery / Pickup page, select the box that says “This Location Offers Local Delivery / Pickup”.

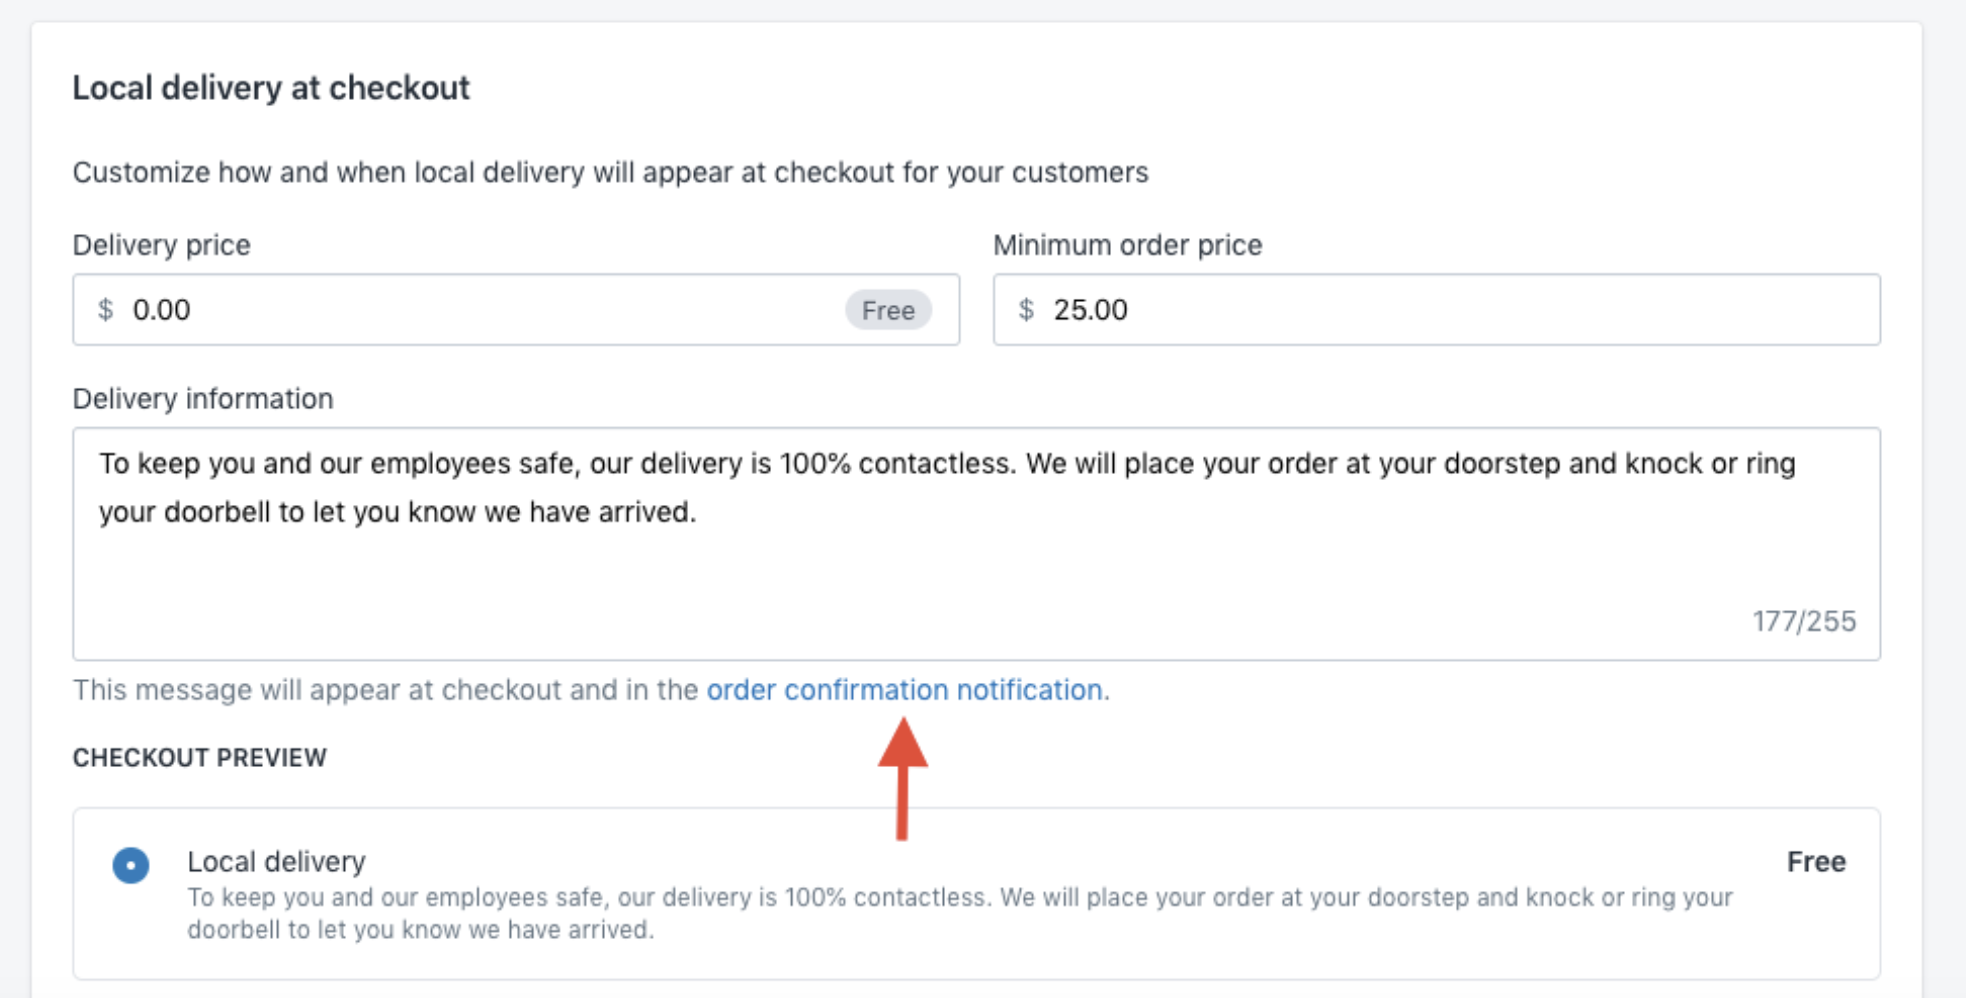
In these sections, it’s easy to create a delivery area based on location radius or zip code, set minimum order amounts, and set the time it takes for orders to be ready for pickup.
For deliveries, we recommend using the “Delivery Information” section to reassure your customers that the delivery option is safe and your delivery driver will be mindful of any contactless delivery policies your restaurant has implemented.
You will also want to change the order confirmation notification by clicking on the link below the “Delivery Information” text field.
You’ll then see a plain text field with HTML script – don’t let this discourage you! You’ll just need to change one line to make your confirmation prompt make sense for your customers. The line you’re looking for will look something like this:
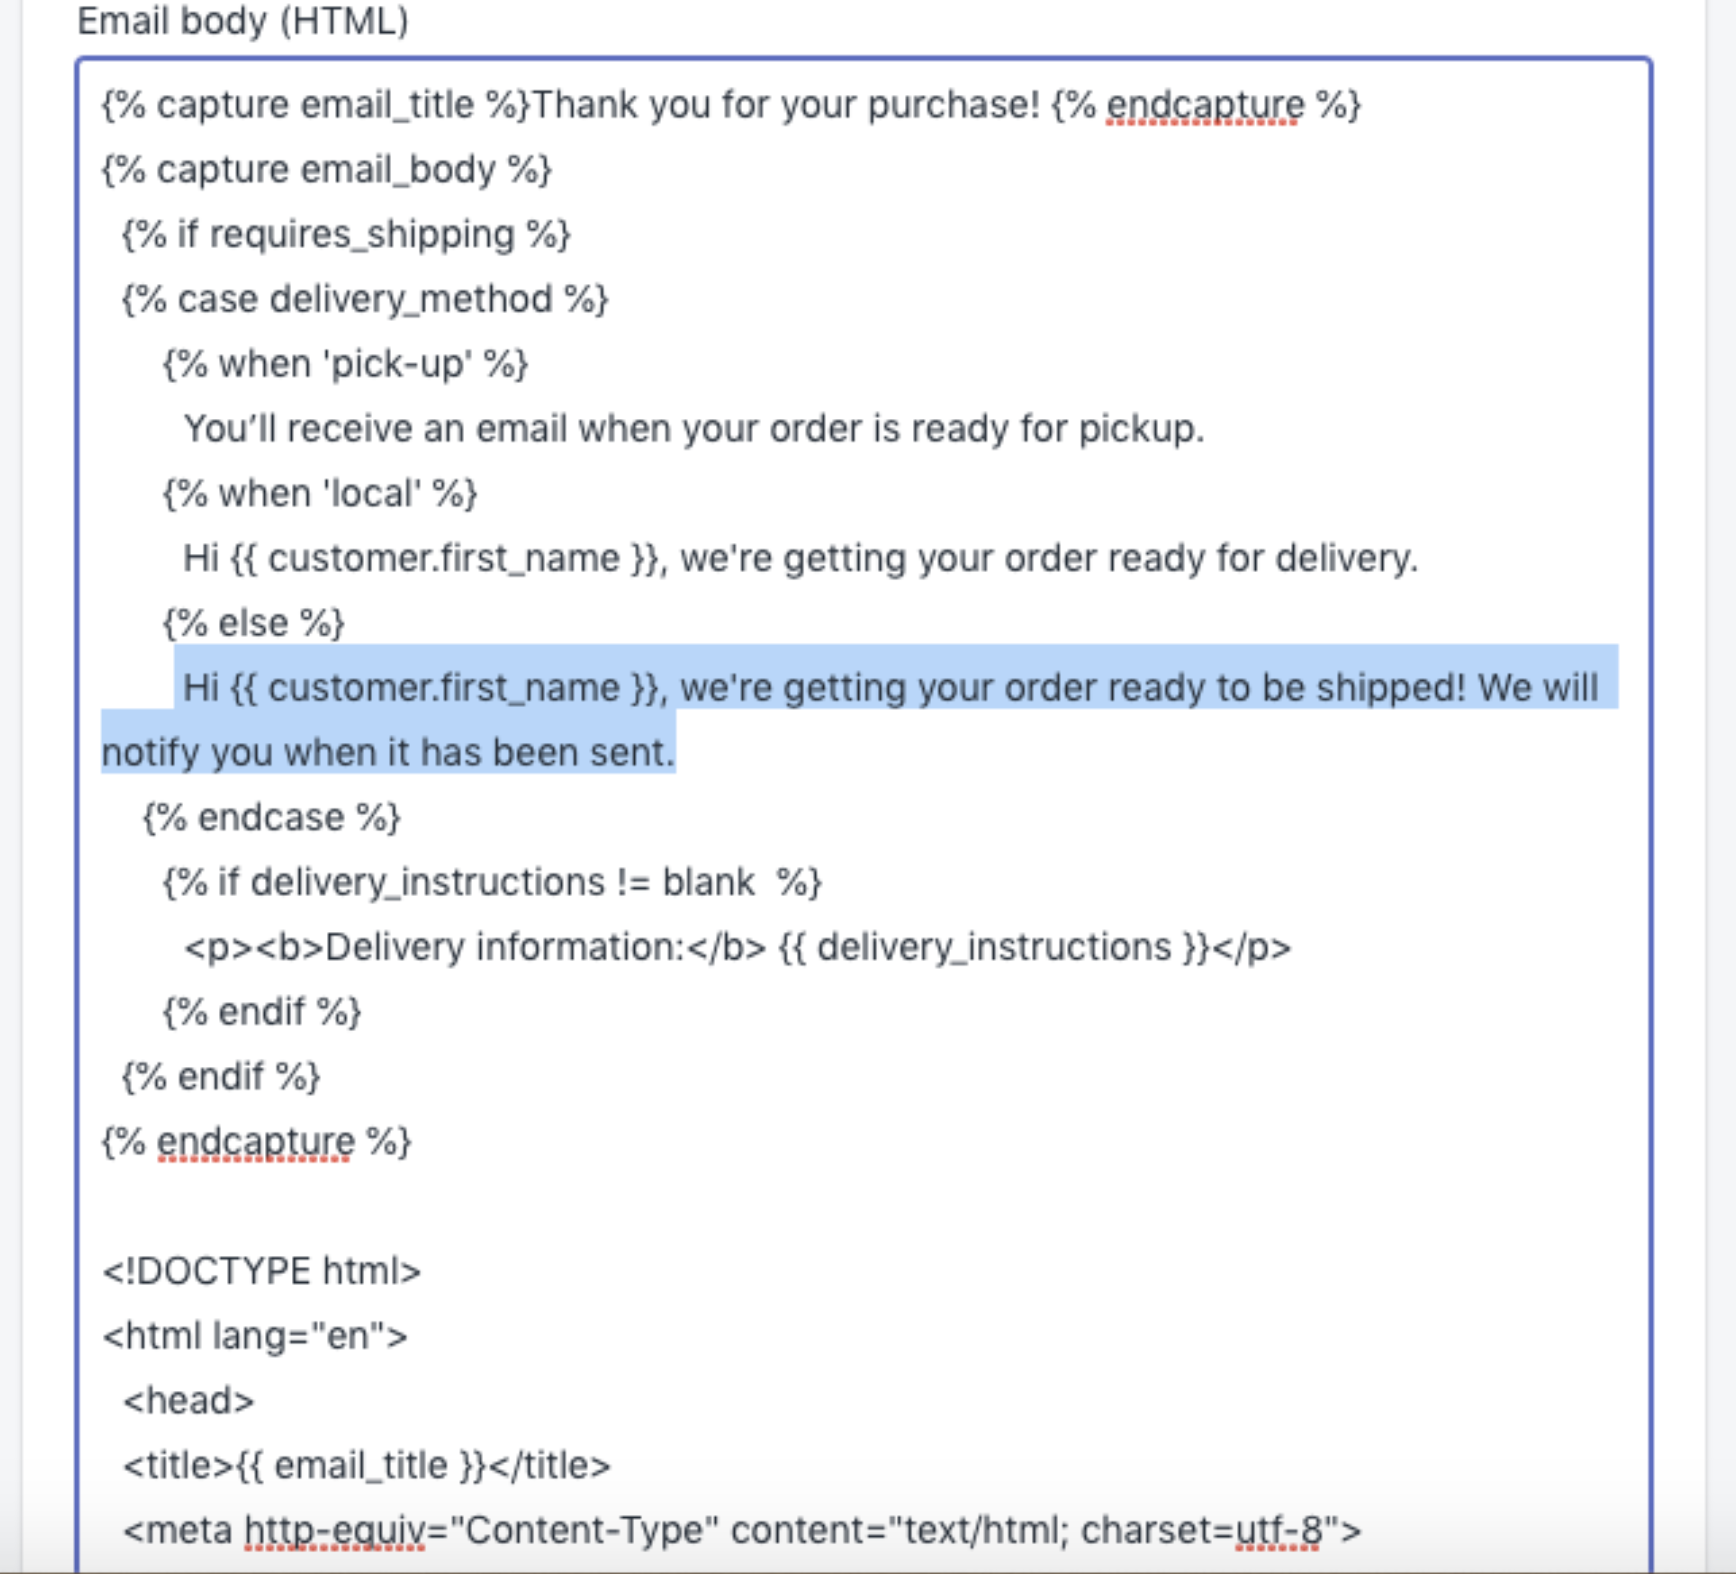
You can change this text to anything you would like, but make sure to include the {{ customer.first_name }} command to make the confirmation more personalized.
Make sure your confirmation prompt says what you want it to say by previewing it before exiting. This is what our prompt looks like:
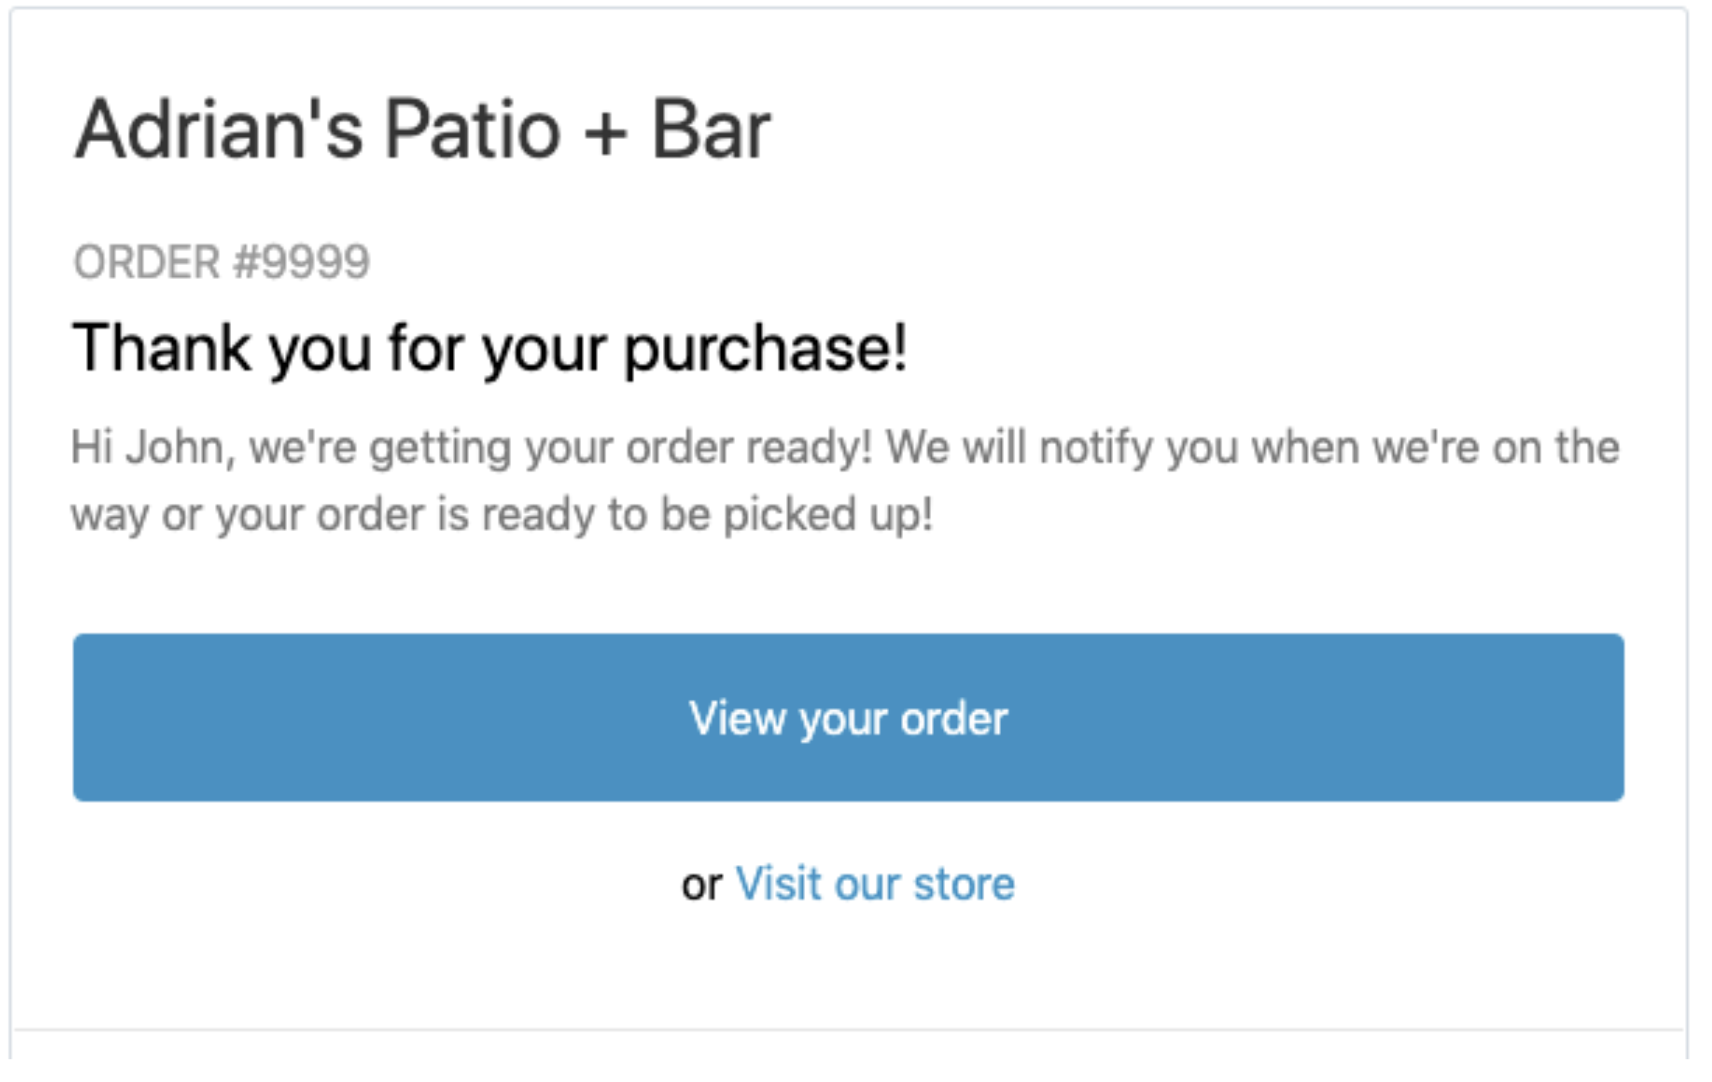
Now that most of the backend of your website is all set up, you can now start to customize the appearance of your site. The Shopify design team has already done most of the heavy lifting for you, you’ll just need to make a few minor adjustments to the wording so that it fits your brand.
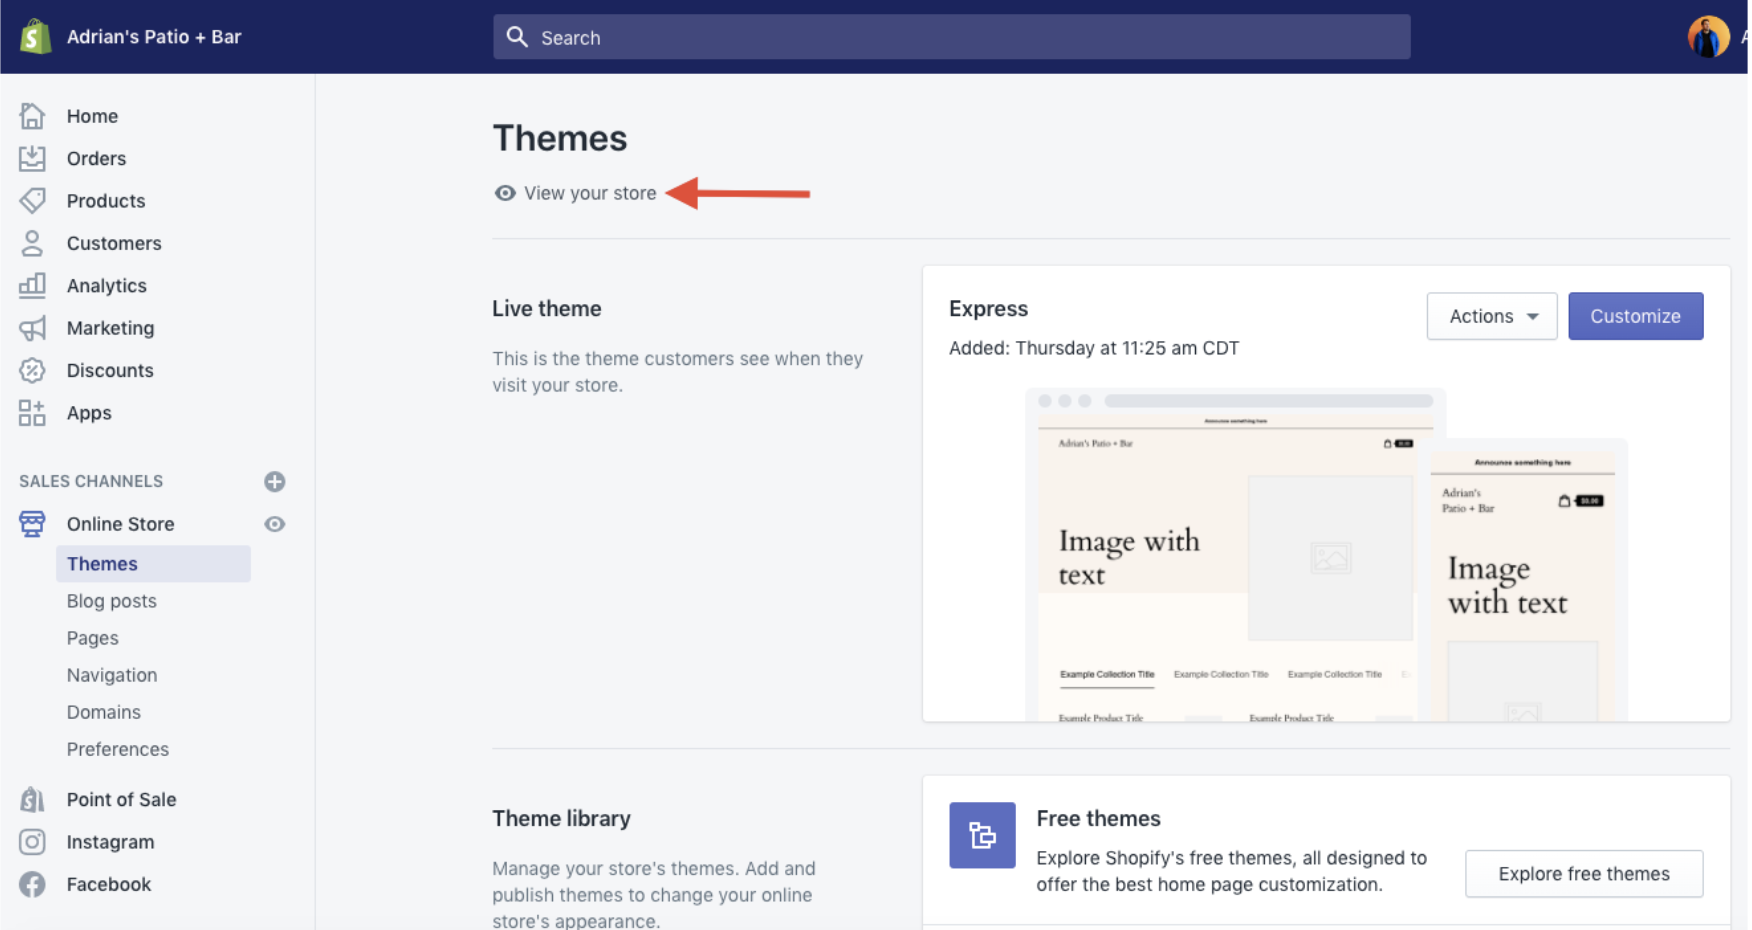
To begin making these small tweaks, navigate to the “Themes” section under “Online Store”. Then click on “View your store”. You will see a preview of what your store looks like currently in its default setting. Hit “Edit Homepage” to begin making your adjustments.
Click through the various sections on the left to make changes to each area of your restaurant’s online ordering website.
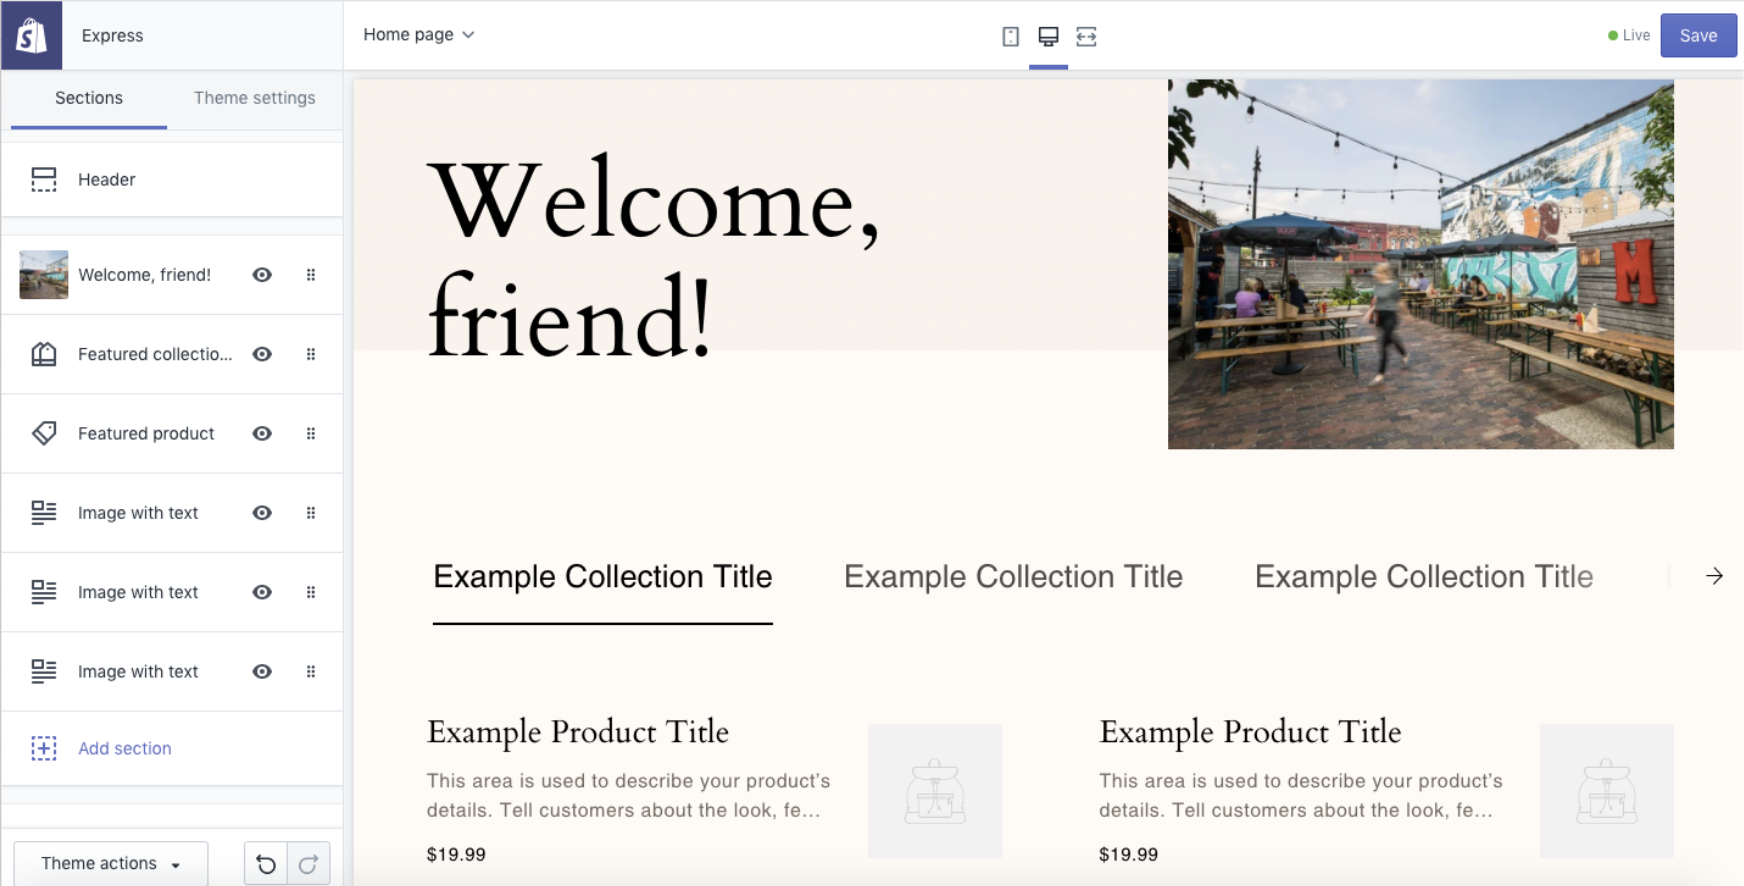
As you click through each section, you’ll see buttons to add collections and products. As you add these to each section, the text and pictures will automatically populate with the information you entered in previous steps – easy!
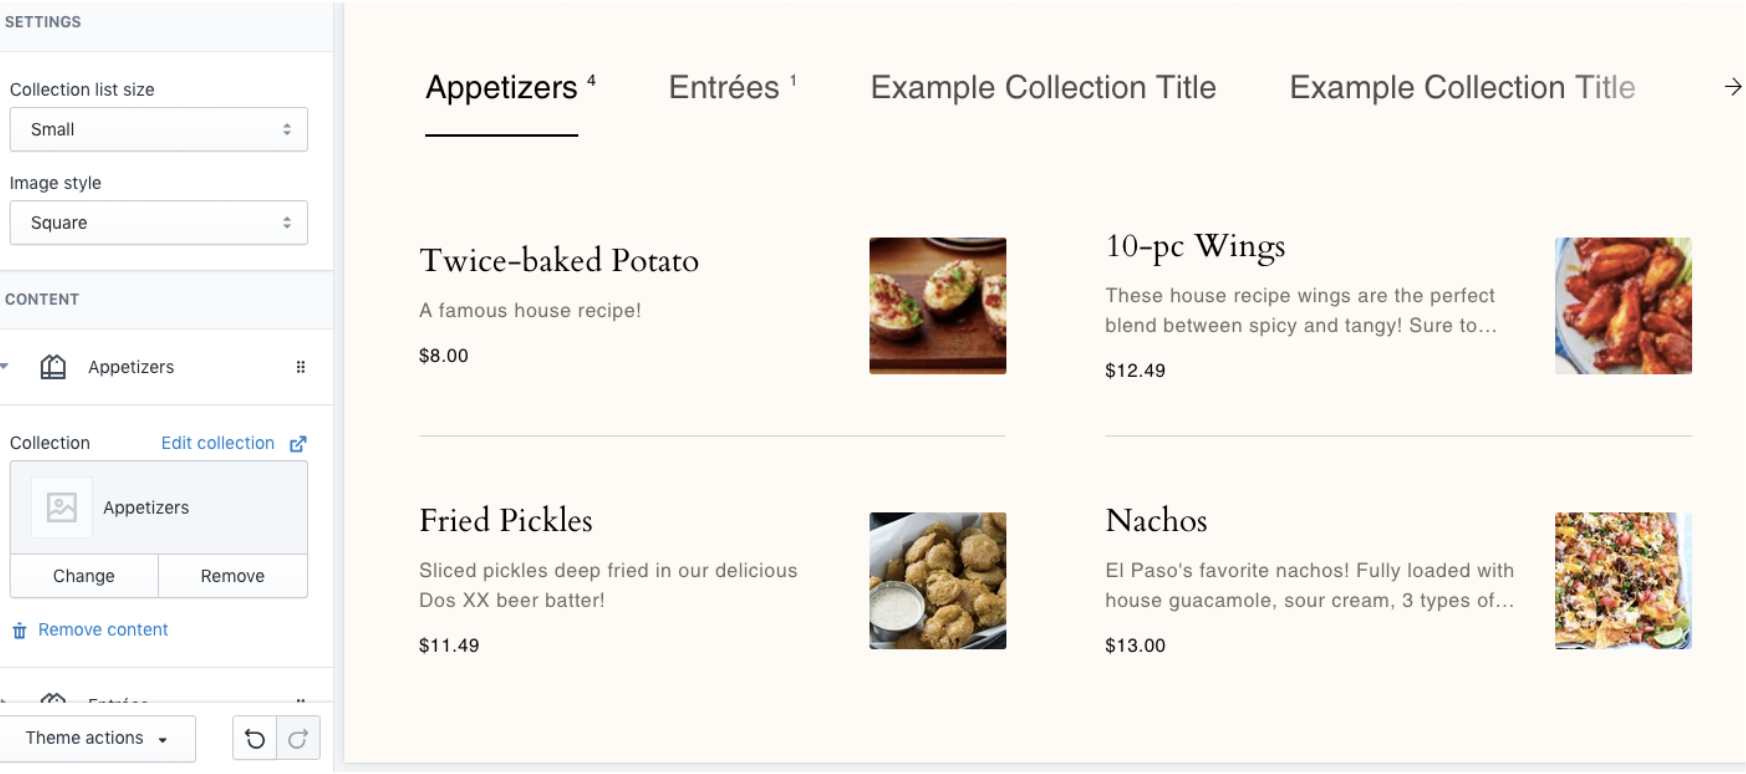
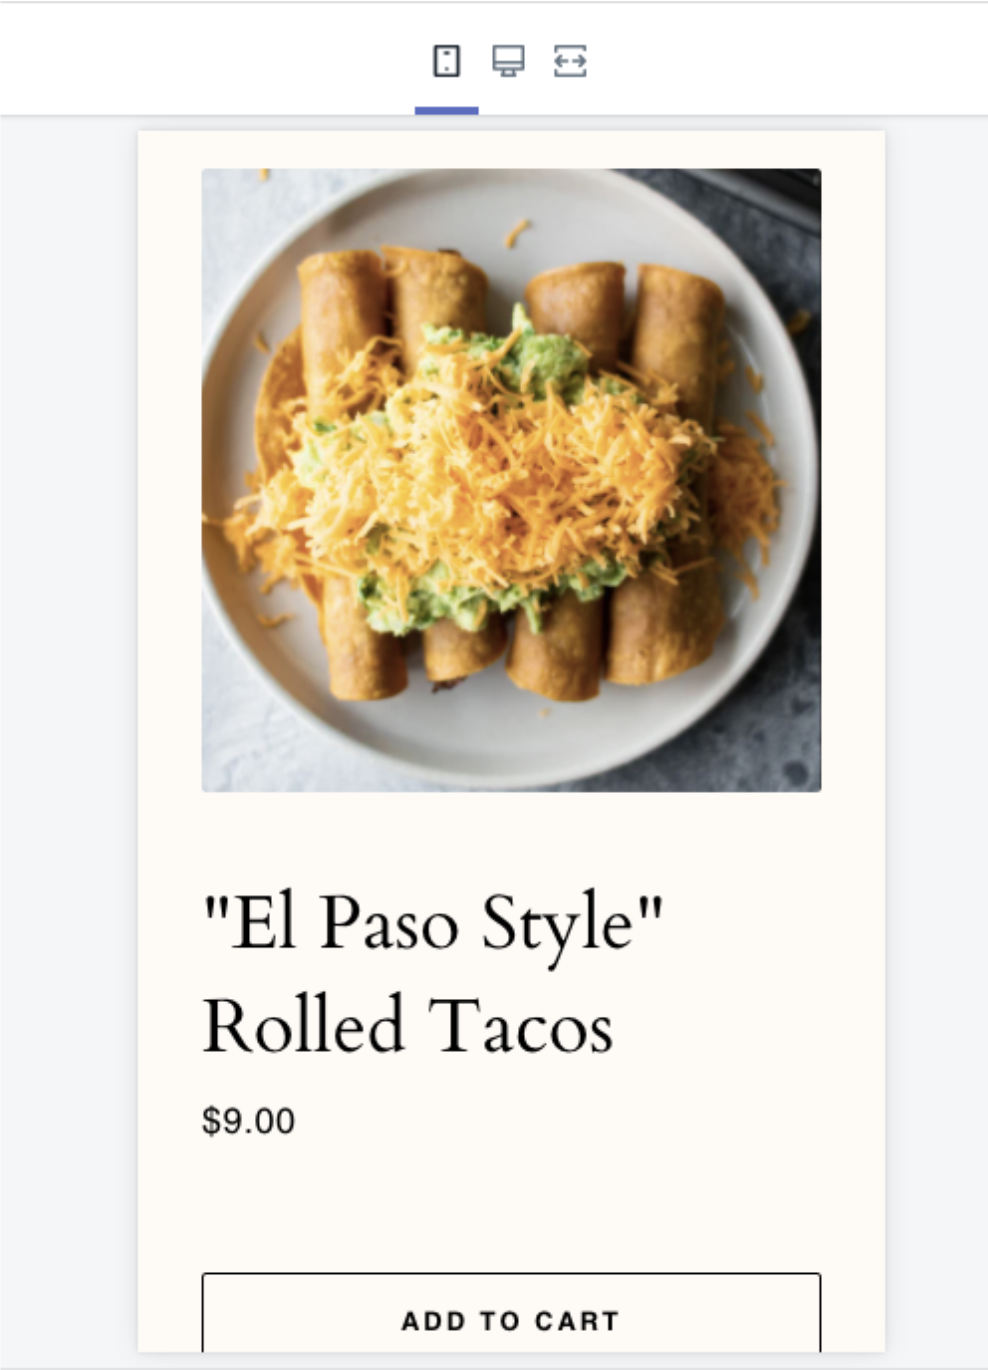
Remember to change your restaurant’s description in the footer and check how your website appears on mobile devices. You can do this by changing the view at the top of the screen.
Add Fivestars Rewards Field at Checkout
It’s quick and easy to start asking your online customers for their Fivestars rewards number or sign up new rewards members with a custom field at checkout.
To do this, navigate to your Settings page. Click on “Checkout” and then “Customize Checkout”.
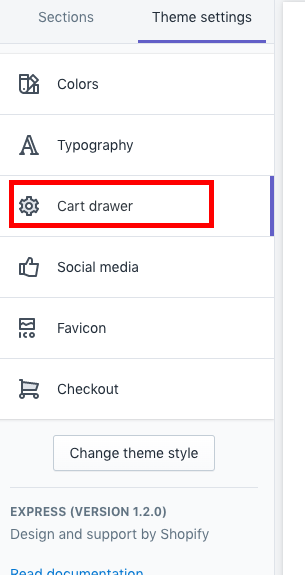
Under the “Theme Settings” tab, select “Cart Drawer”.
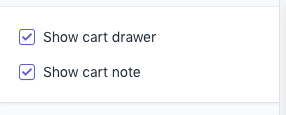
Then make sure that both “Show Cart Drawer” and “Show Cart Note” are selected.
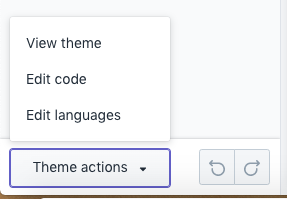
Navigate to the bottom of the page. Click on “Theme Actions” and “Edit Code”.
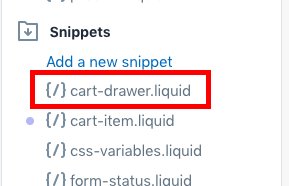
Under “Snippets”, click on the file titled “cart-drawer.liquid”.
We’ve done all the work for you! Delete the entire body of code that is in that file and replace it with this code, by copying and pasting it from the Google Doc and into the cart-drawer.liquid file.
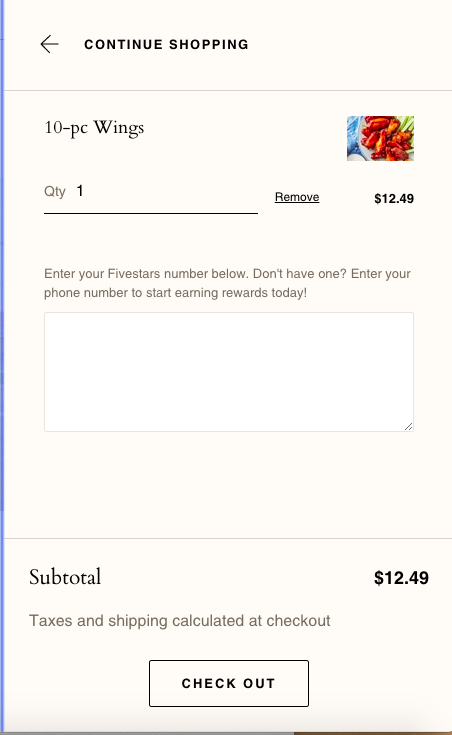
Now, your customers will see this when they’re ready to check out. You can manually enter the number they provided into your Fivestars tablet.
Test Your Site and Start Taking Orders!
Congratulations! You now have a way for your customers to place orders online!
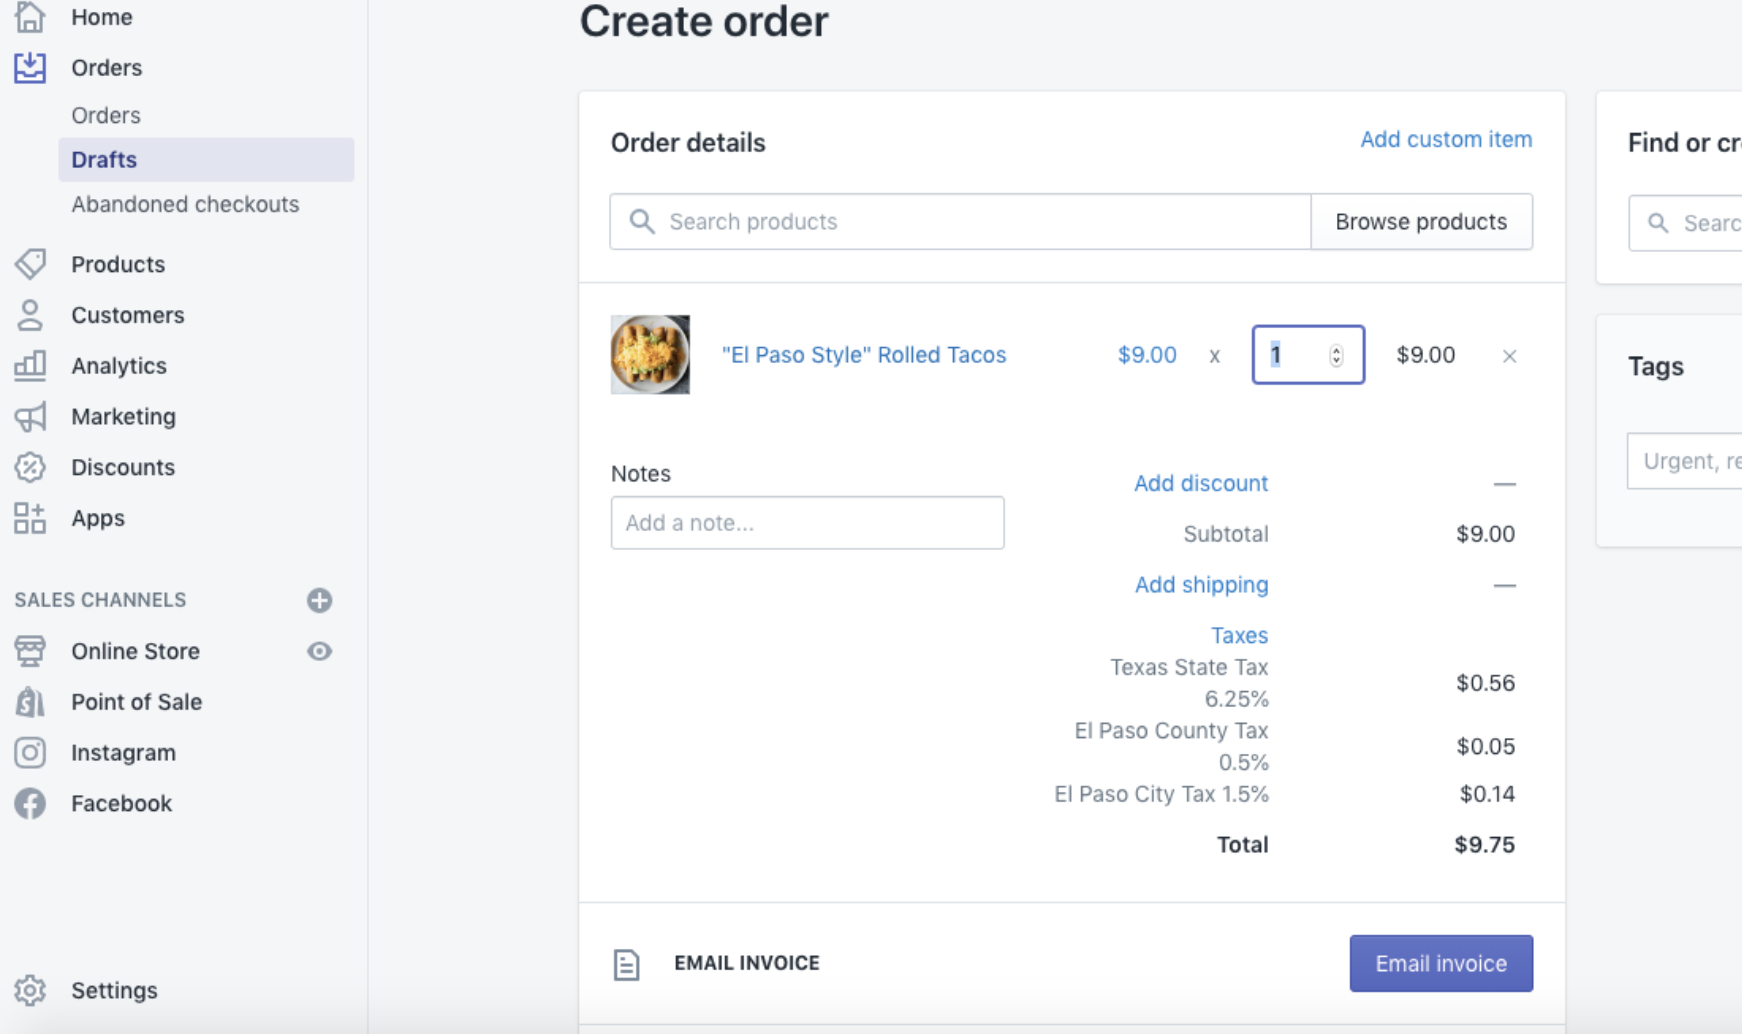
You can run a test order by going back to your Shopify dashboard and navigating to the Orders section. Click on “Create Order” and place an order by adding an item and hitting “Mark as Paid”. You can then go through the flow of receiving orders from customers. You’ll receive an email notification and the order should become viewable under the Orders section. Once the order is fulfilled, you can mark it as such.




Leave a Comment